Becoming friends with your camera
This project looks at how perspective changes with focal length and camera distance.
Part 1: Selfie, the wrong way vs. the right way
Notice that in the first image the ears are not shown. The field of view increases when I'm closer to the lens.

At Figure 1, the Center of projection is approximately at the midpoint between the eyes.
To get the image, I manually selected two points in each photograph so the distant would remain constant across pictures;
later, the units and coordinates were changed such that the distance between the two selected points was 12.8cm(measured distance).
To avoid image unwanted manipulation I made sure that matplotlib library doesn't alter the subplot's original size when
using imshow, and perfom cropping using the same ratio as the original image to avoid distortions as much as possible.
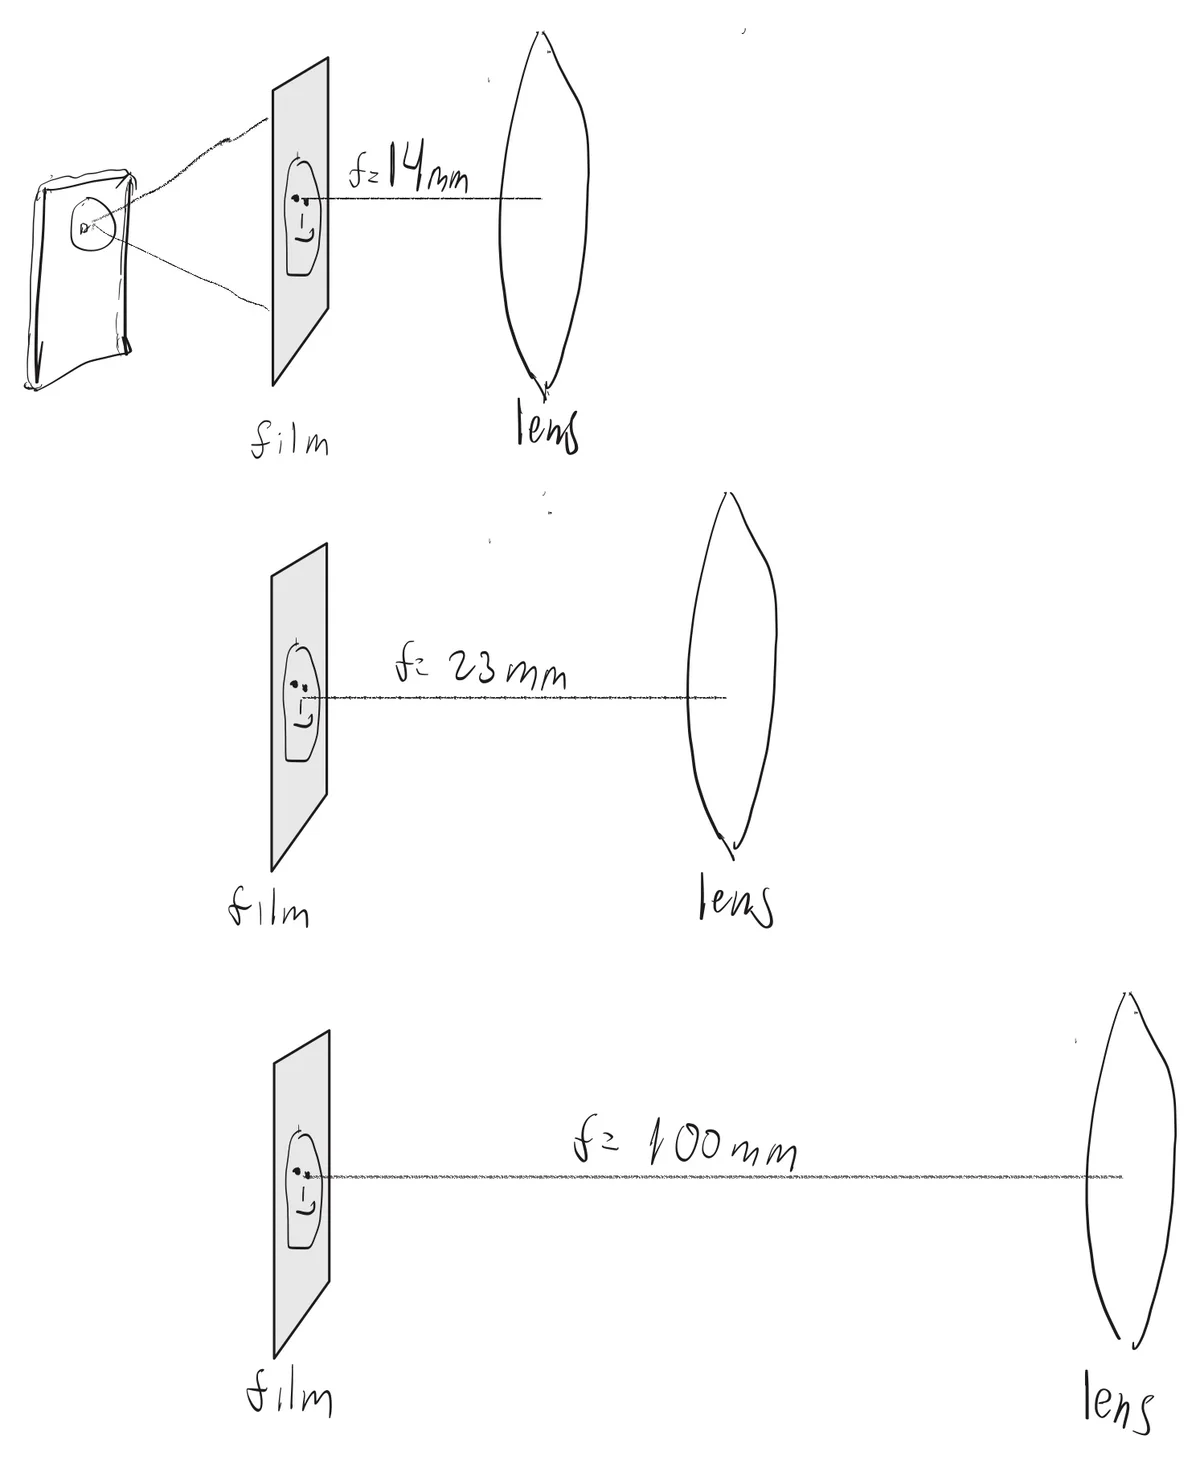
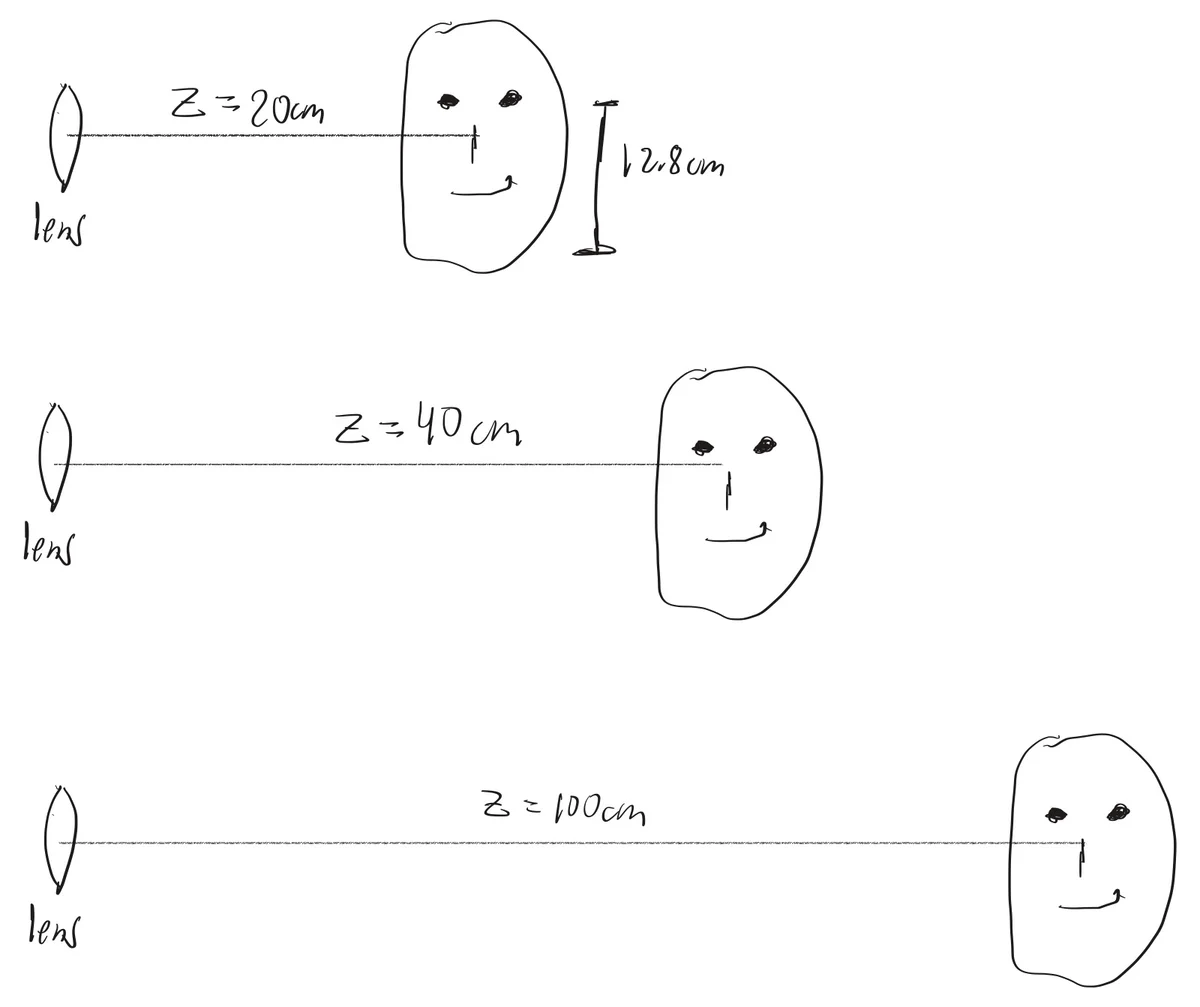
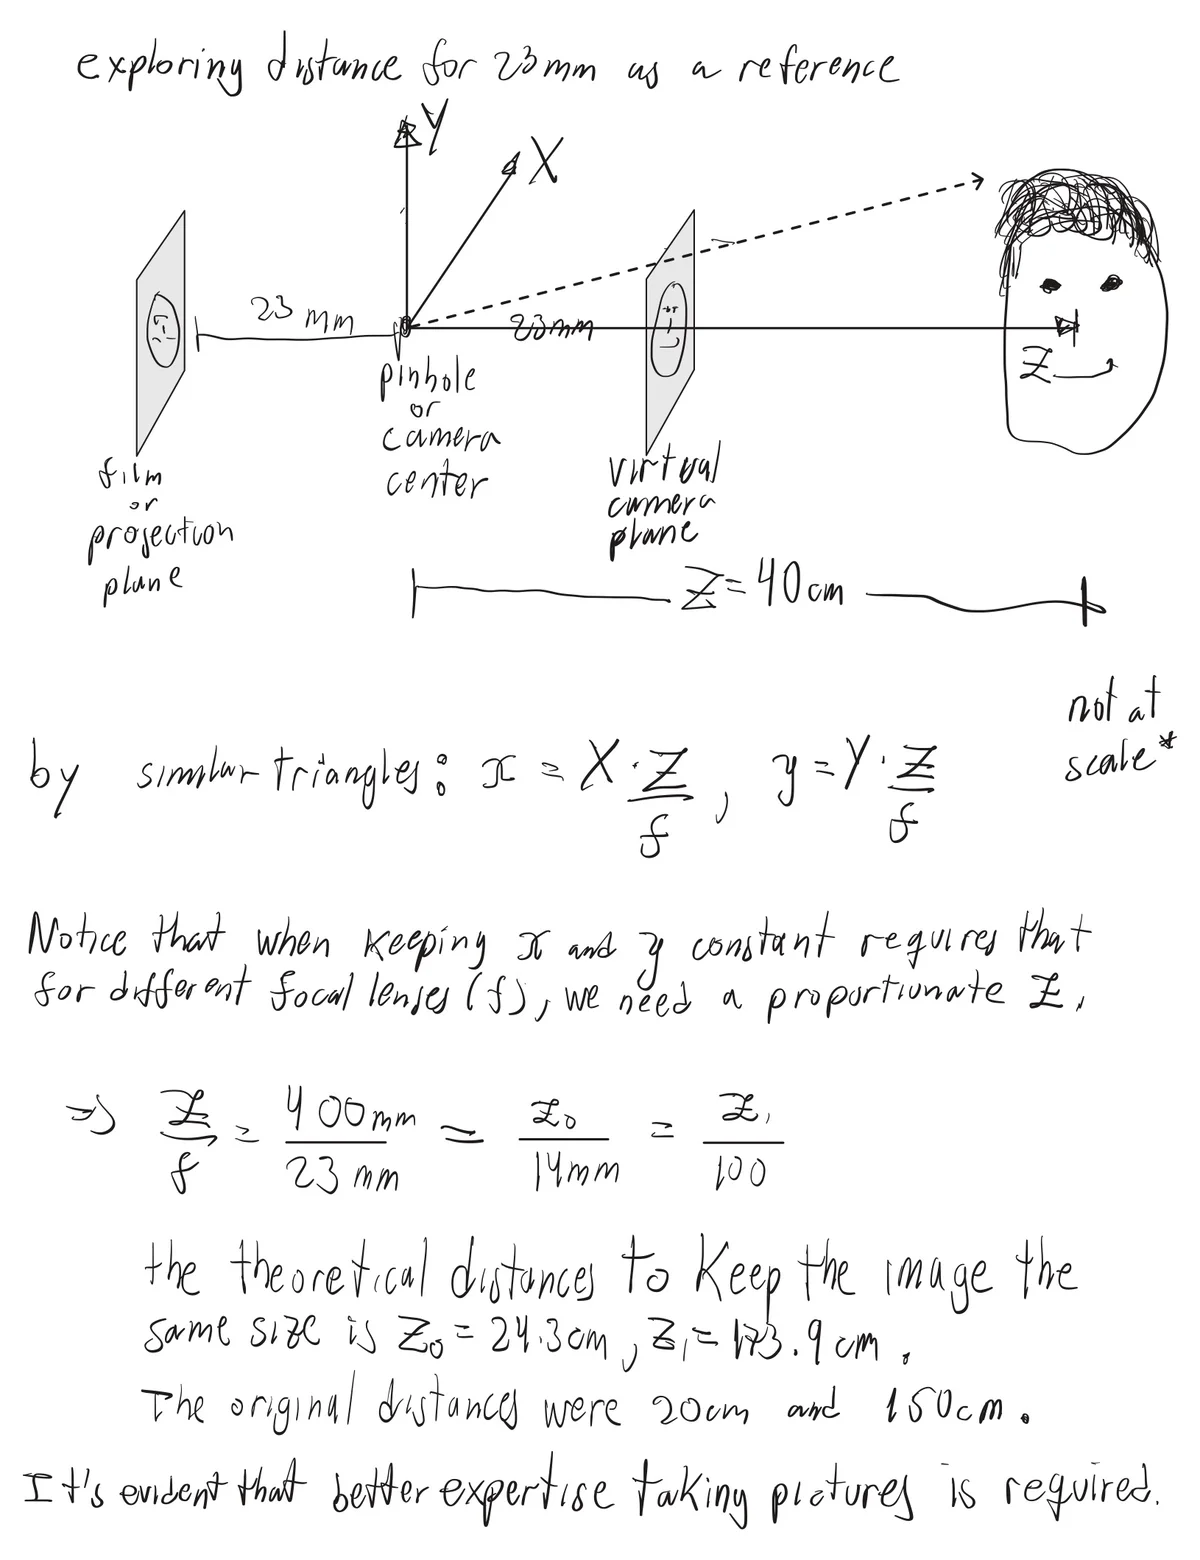
to see why the ear is not shown in the first picture, we use the equation x = f · X/Z to calculate the landing position of the cheek and the ear: distance x for cheek x = f · 8/(20+5) being 5cm the depth of the cheek; and x for ears = x = f · 10/(20+10) with 10cm the depth of the ears and 10cm the distance from the focal point to the ear in X coordinates; since we are comparing for each lense, we can safely ignore the focal length. xcheeks = 0.32, xears = 0.33. According to these numbers we should be able to visualize the ears, we will leave this since the measurements weren't particularly precise. But in theory, when xcheeks > xears, the ears are not going to be shown in the 2D projection.
Using the previous equation we notice the magnification is f/Z and is the same for points in the same Z. To compare the magnification of the nose to the face we need just the difference in depth of the tip of the nose with the cheeks (5cm). The ratio of magnification is dividing both magnifications, which only leaves us with Z: (Z+5)/Z. Notice as Z->inf the ratio of magnification goes to 1, but when we are close to the camera, such as the first picture, the ratio is 25/20 = x1.25, nose was escalated 1.25 times as the rest of the face.
Part 2: Architectural perspective compression
Two shots were taken at night of Doe Library, in both pictures the ISO was at it's minimum which is 50; WB fixed; shutter was higher to compensate for ISO, I used a small tripod to avoid unintentional movements and hoped for no people moving at the scene. In the second picture you can appreciate people sitting on a bench, they are blurry because they were slightly moving. To take the closer picture I moved directly to the center of the image which I intended to be the library door at, what I can estimate as, ~60°. Google Maps allowed me to retrieve the distances between the main door and the position at which I took the pictures which is 35m & 100m approximately. You can notice that the parallel lines converge at different points. The field of view increases when I'm closer to the building.

Part 3: The dolly zoom
Small berkeley bear next to a ship.
The images to create the video were interpolated using cv2 functions SIFT that allows us to record distinctive spots of an image and RANSAC for an affine transformation, the code for sampling intermediate images was vibecoded, a total of 360 images generated.
ffmpeg was used to encode at 30fps via x264 encoder to get a 12s video.
Notes
All the code for this assignment is on GitHub, in cs180/hw0.
Taking more importance to a reference principal point in the focal axis and using the grids of the camera can be useful for reproducibility.
When taking further photos, look at your surroundings and make sure no one is planning to move in front of the camera specially if your shutter is slow.
I enjoyed testing different settings on my camera, I have better ideas of how to take great photos.